Magic Wand Tool
 |
| magic wand tool |
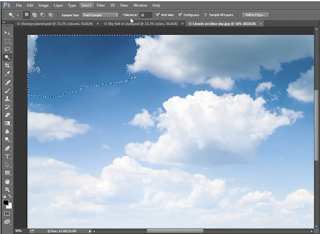
For example, some clouds.
As you can see, by clicking with the magic want tool, it only selected a small space of the blue sky.
To select a more of the sky, or a wider range of blues, you can adjust the Tolerance Value, which is located near to top of the screen.
| contiguous check box |
To add to the selection you have already made, shift + click in new locations in the image to add new selections while still using the Magic Wand tool.
To remove an area that has been selected, alt + click will allow you to make edits to certain areas.
While selecting new areas of the image, make sure to adjust the tolerance levels whenever needed to make sure your next click only selects what you want, and none of what you don't.
 After selecting all of the blue of the sky, go to the Select menu and click Inverse, which changes everything that has been selected, so that only the clouds are what is selected in the image.
An alternative way to quickly select the blue of the sky, is to have one location of the sky selected already using the Magic Wand tool and then going to the Select menu and clicking Similar, which will automatically select any similar colors in the image. You can repeat this process until all the stuff you want selected is selected, but be aware that it will stop being as effective after a few runs.
 Another choice, you can use the Rectangular Marque tool to make selections around the image, first by making one selection, and then creating more by shift + clicking into new ones. One you are satisfied, you can go to the Select Menu and click Similar, and it will select colors in the image that are similar to everything you have already selected.
Refining Selections
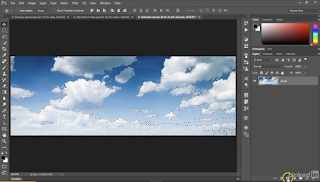 Now that everything is sort of selected, add a layer mask by clicking on the Layer Mask icon at the bottom right of the screen.
It should make a thumbnail that looks like an inversion of the image you created a mask of.
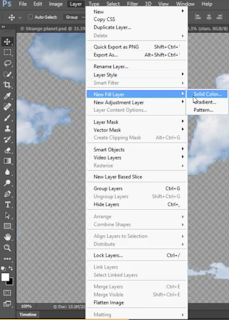 While that layer is selected, go to the Layer menu, go to the New Fill Layer tab, and click Solid Color.
Name the new layer whatever you like, but in this example, it will be named Red, because of what we will be filling it with.
Now drag this new layer to underneath the layer with the clouds; to look like this.

Now, with the clouds layer selected, go to the Select Menu and click Select and Mask. This should bring you to a very different workspace.
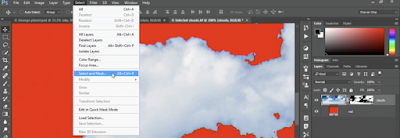
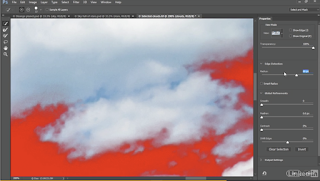 In this new workspace, set the Transparency slide bar to 100% so that that red shows up again.
Then expand the Edge Detection option, and notice the Radius slide bar.
By increasing the Radius slide bar, you will notice the transitions around the clouds become cleaner, like so.
Click Okay to accept that change!
Comments
Post a Comment